Tutorials ⟩ Roland JV-2080 battery replacement
When you power up your JV-2080 and notice the message "battery low", the time has come to exchange the internal buffer battery. This internal battery keeps your custom settings and user presets stored when switching the device off. Exchanging the battery is not that complex as you might think.
First some informations which should be considered:
Safety advice
Make sure you have disconnected the device from voltage before opening the chassis and starting the replacement!
Please notice: You replace the battery on your own risk!
This tutorial shows the procedure of exchanging the internal battery. The author of this article (CYAN) is not responsible for any damage or data lost during the exchange procedure. Always be gentle and careful when acting inside an opened device!
Backup your customer settings and your user presets!
Your custom settings and user presets may be gone after replacing the battery. Make sure you backup all your data before starting. You can use an optional storage card, like the Roland M256-E or Roland M512-E. Otherwise, you can use any Sysex dump tool you prefer.
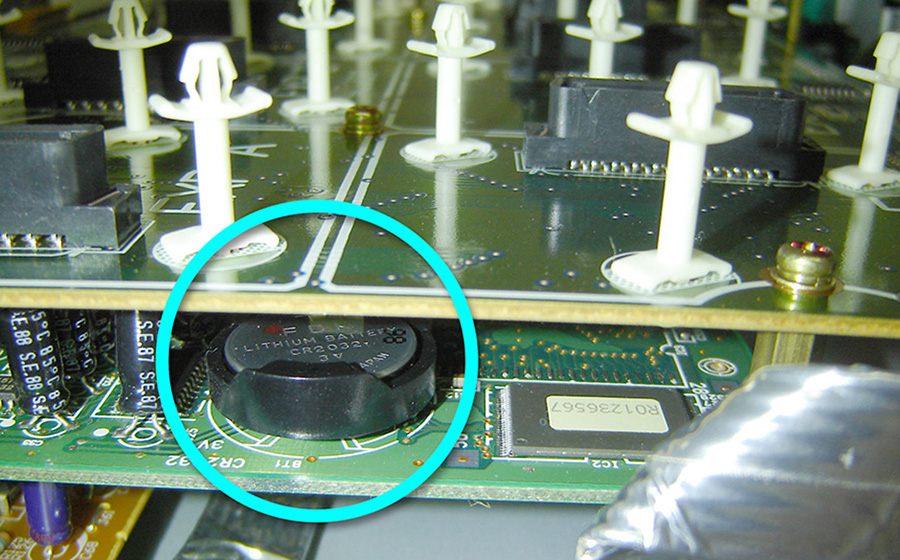
Battery type
The internal battery of the JV-2080 is a standard "CR 2032 lithium battery", running on 3V.
What tools are required for replacement?
⟩ A Phillips Screwdriver (to open the chassis)
⟩ A Tweezer
⟩ Adhesive tape
⟩ Post-It notes (optional)
⟩ A cotton bud
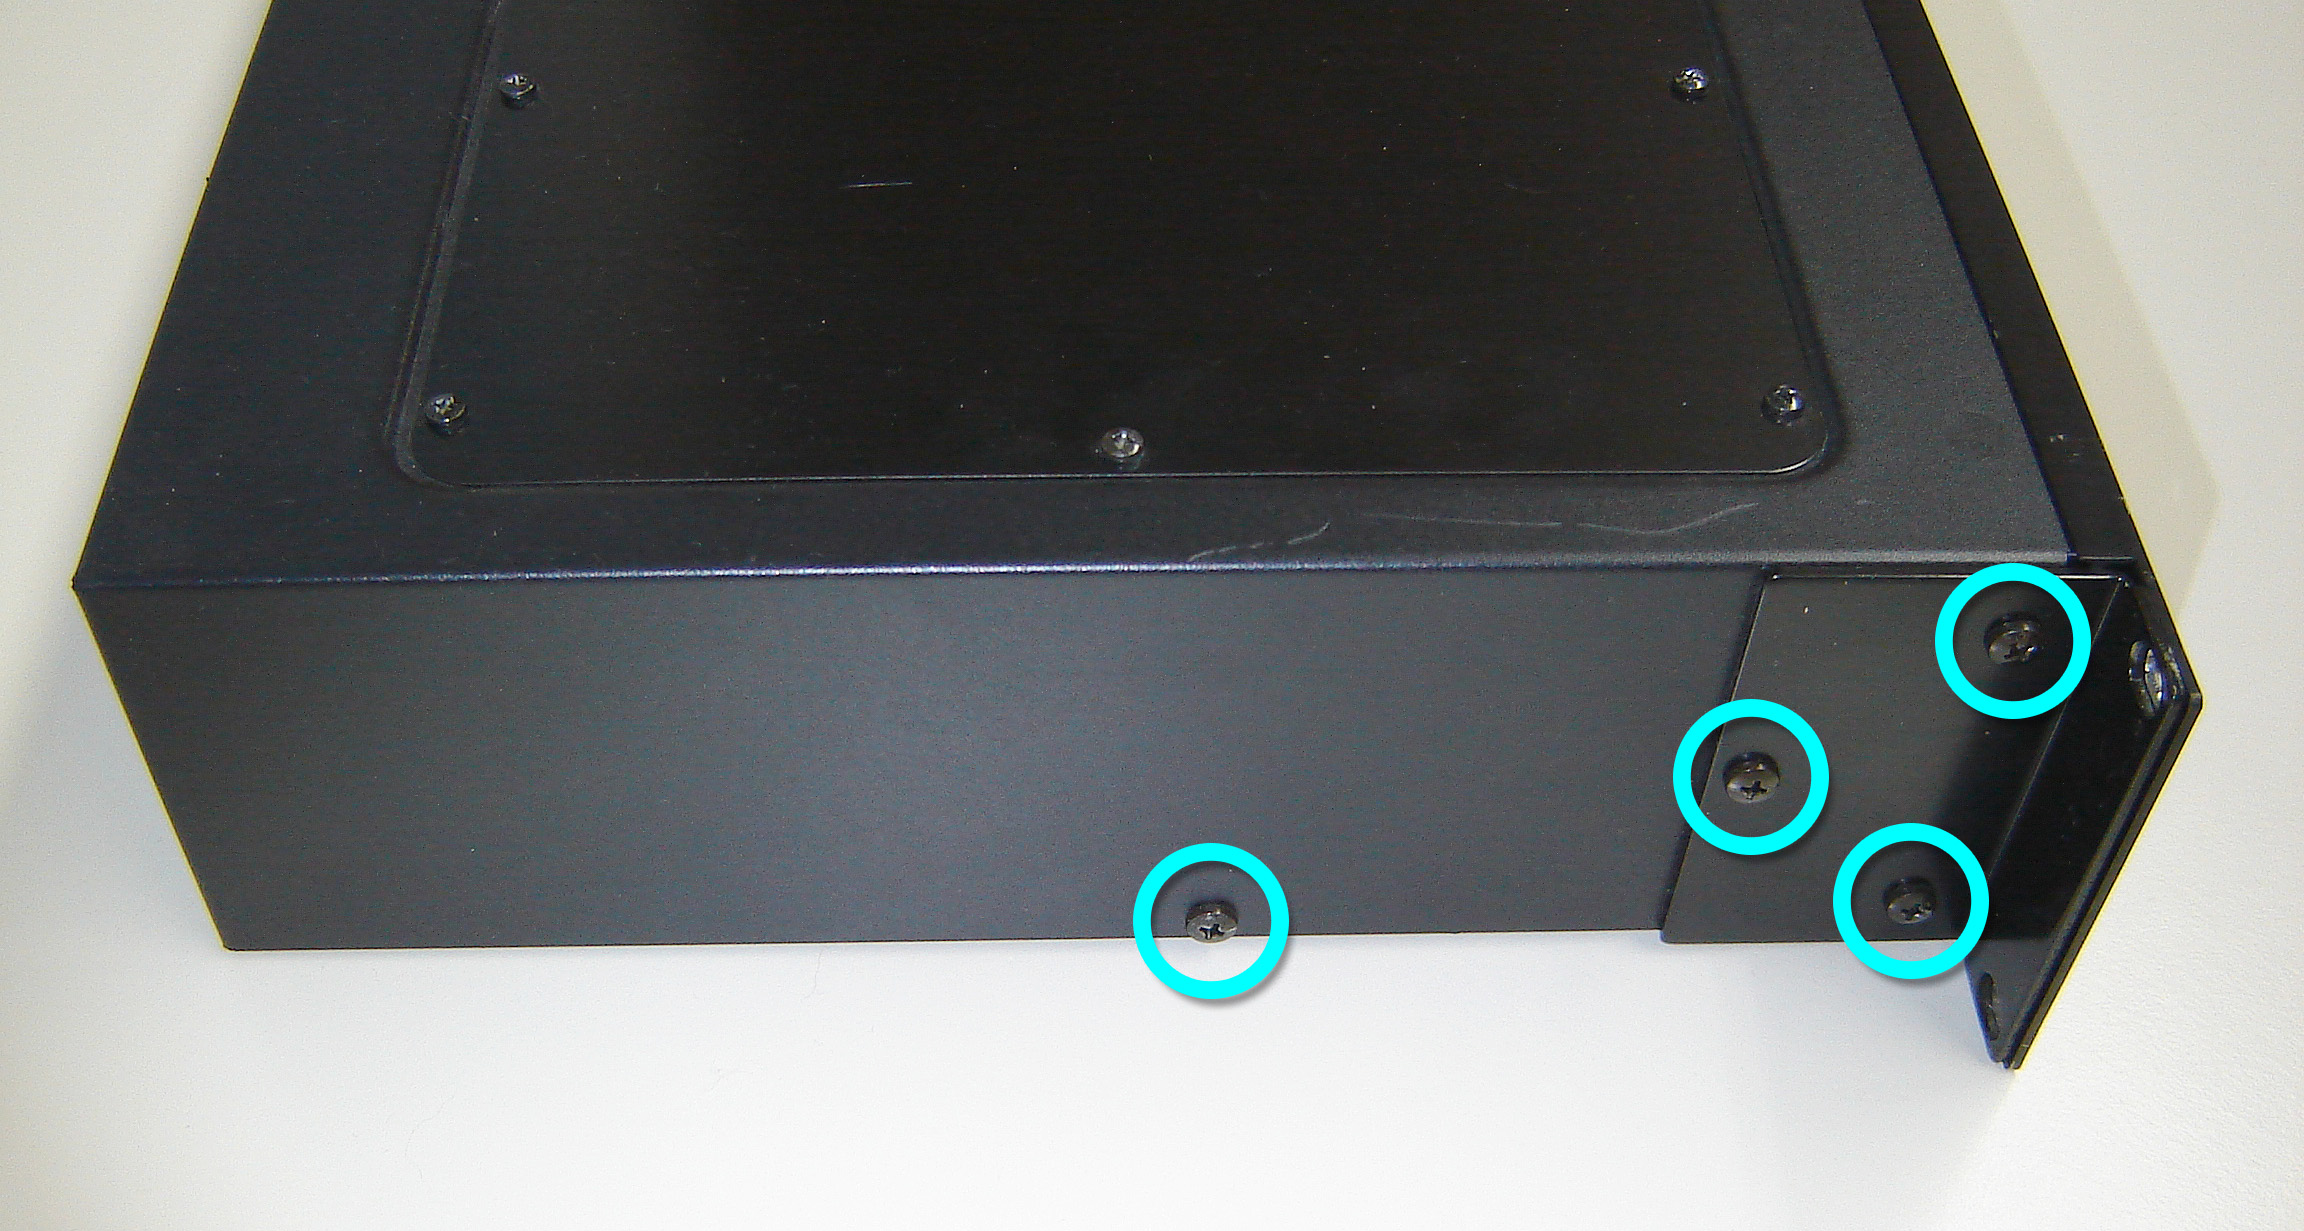
Step 1
Remove the screws on the left side and the right side of the chassis. The screws which need to be removed are marked here with cycles.
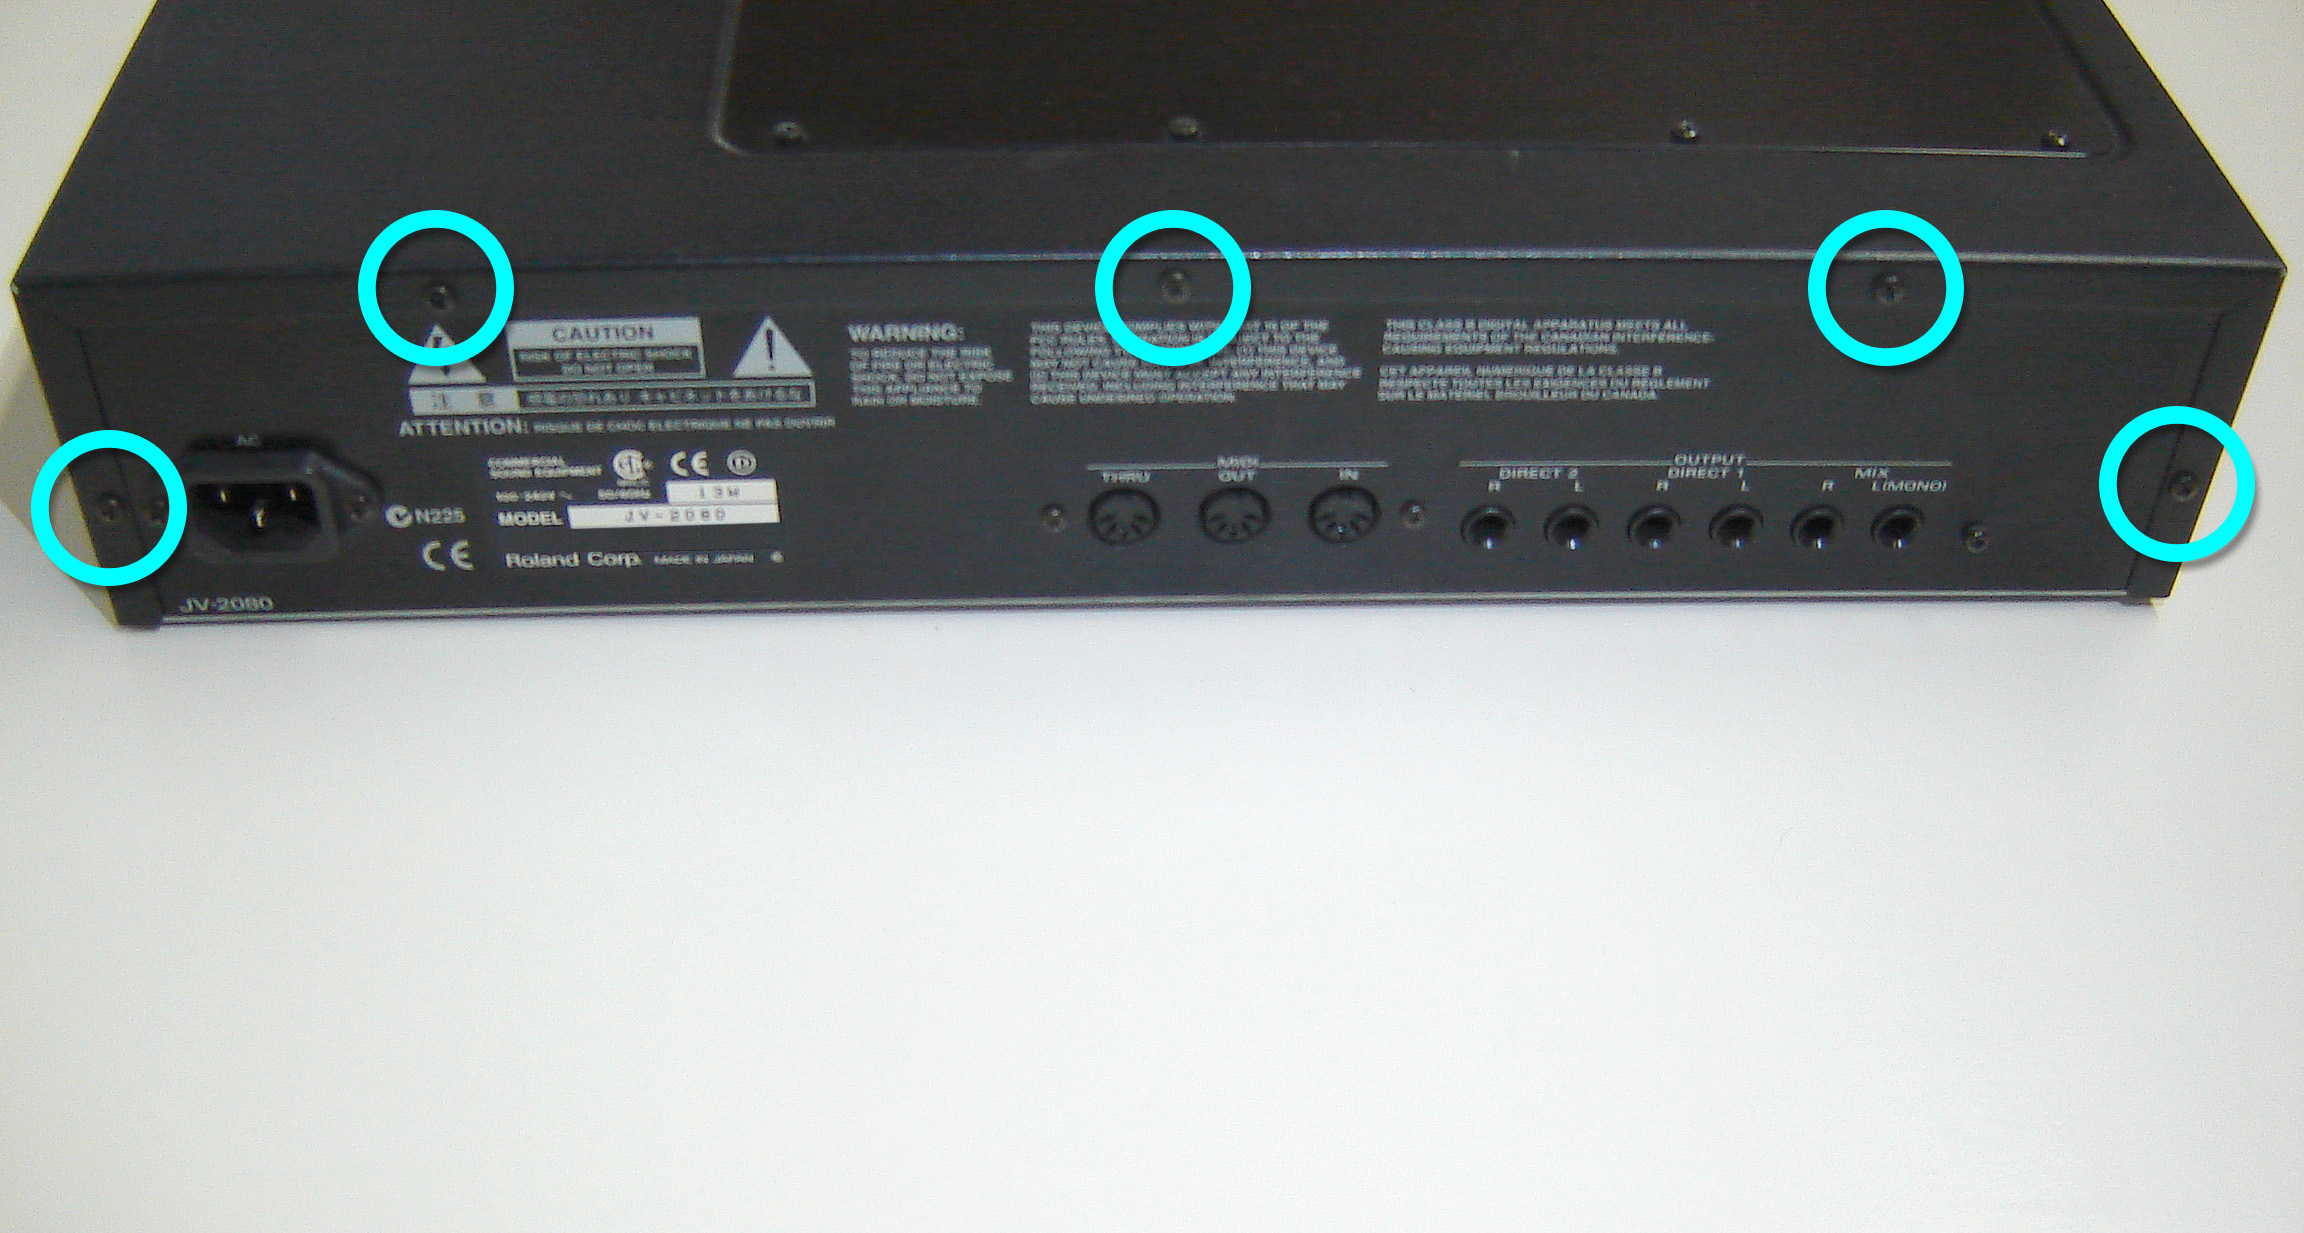
Step 2
Remove the screws on the backside of the chassis, as marked here with cycles.
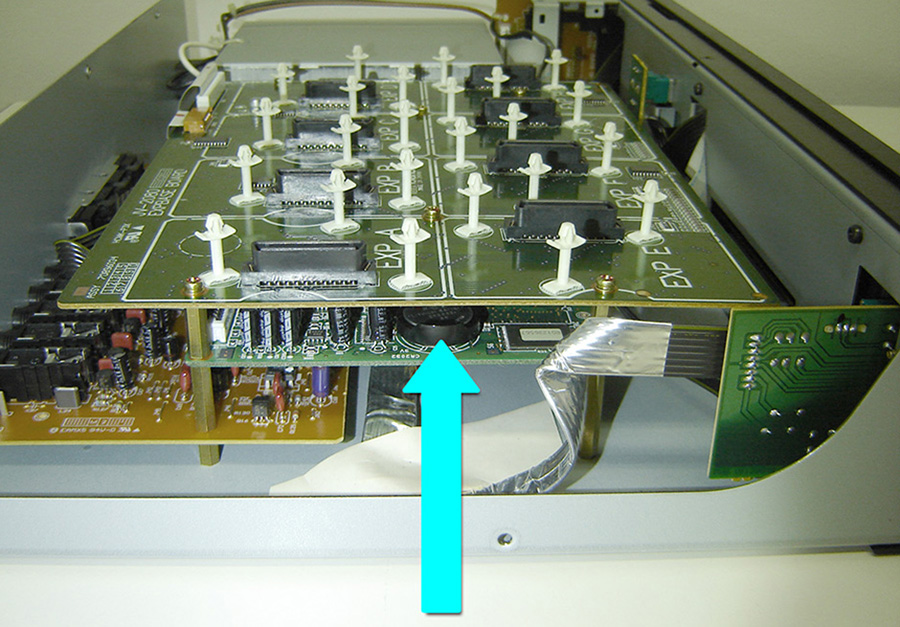
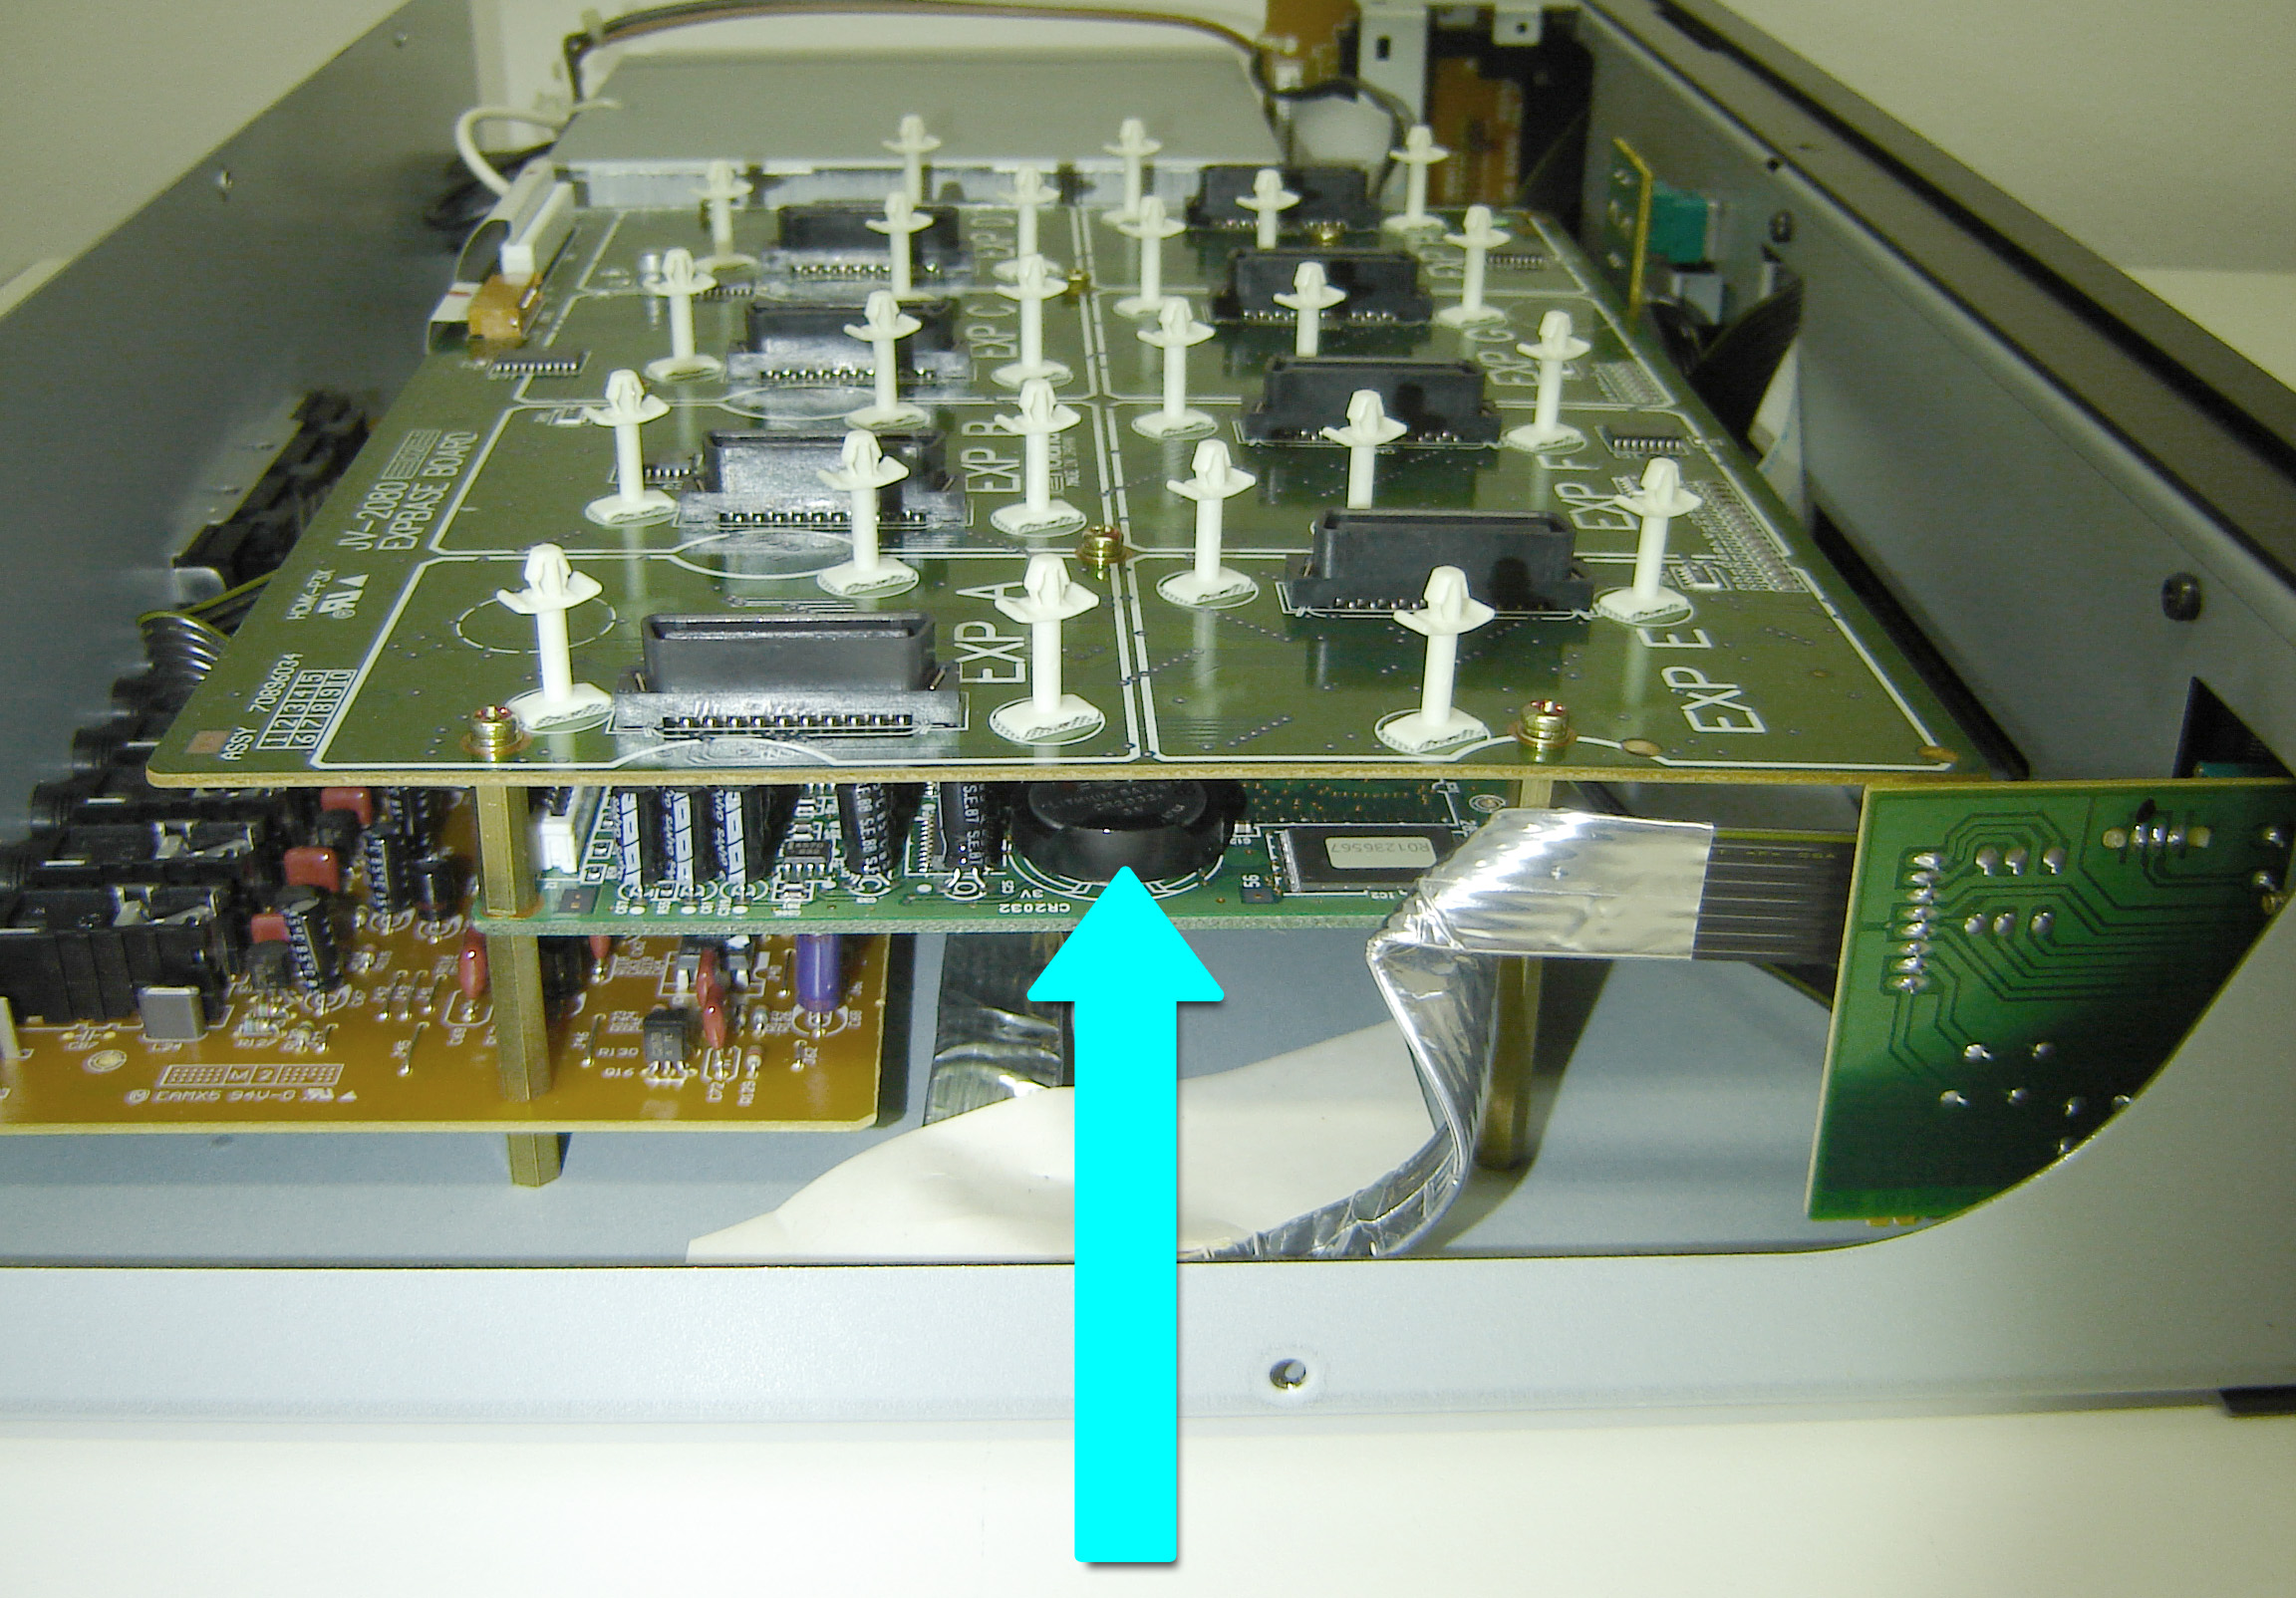
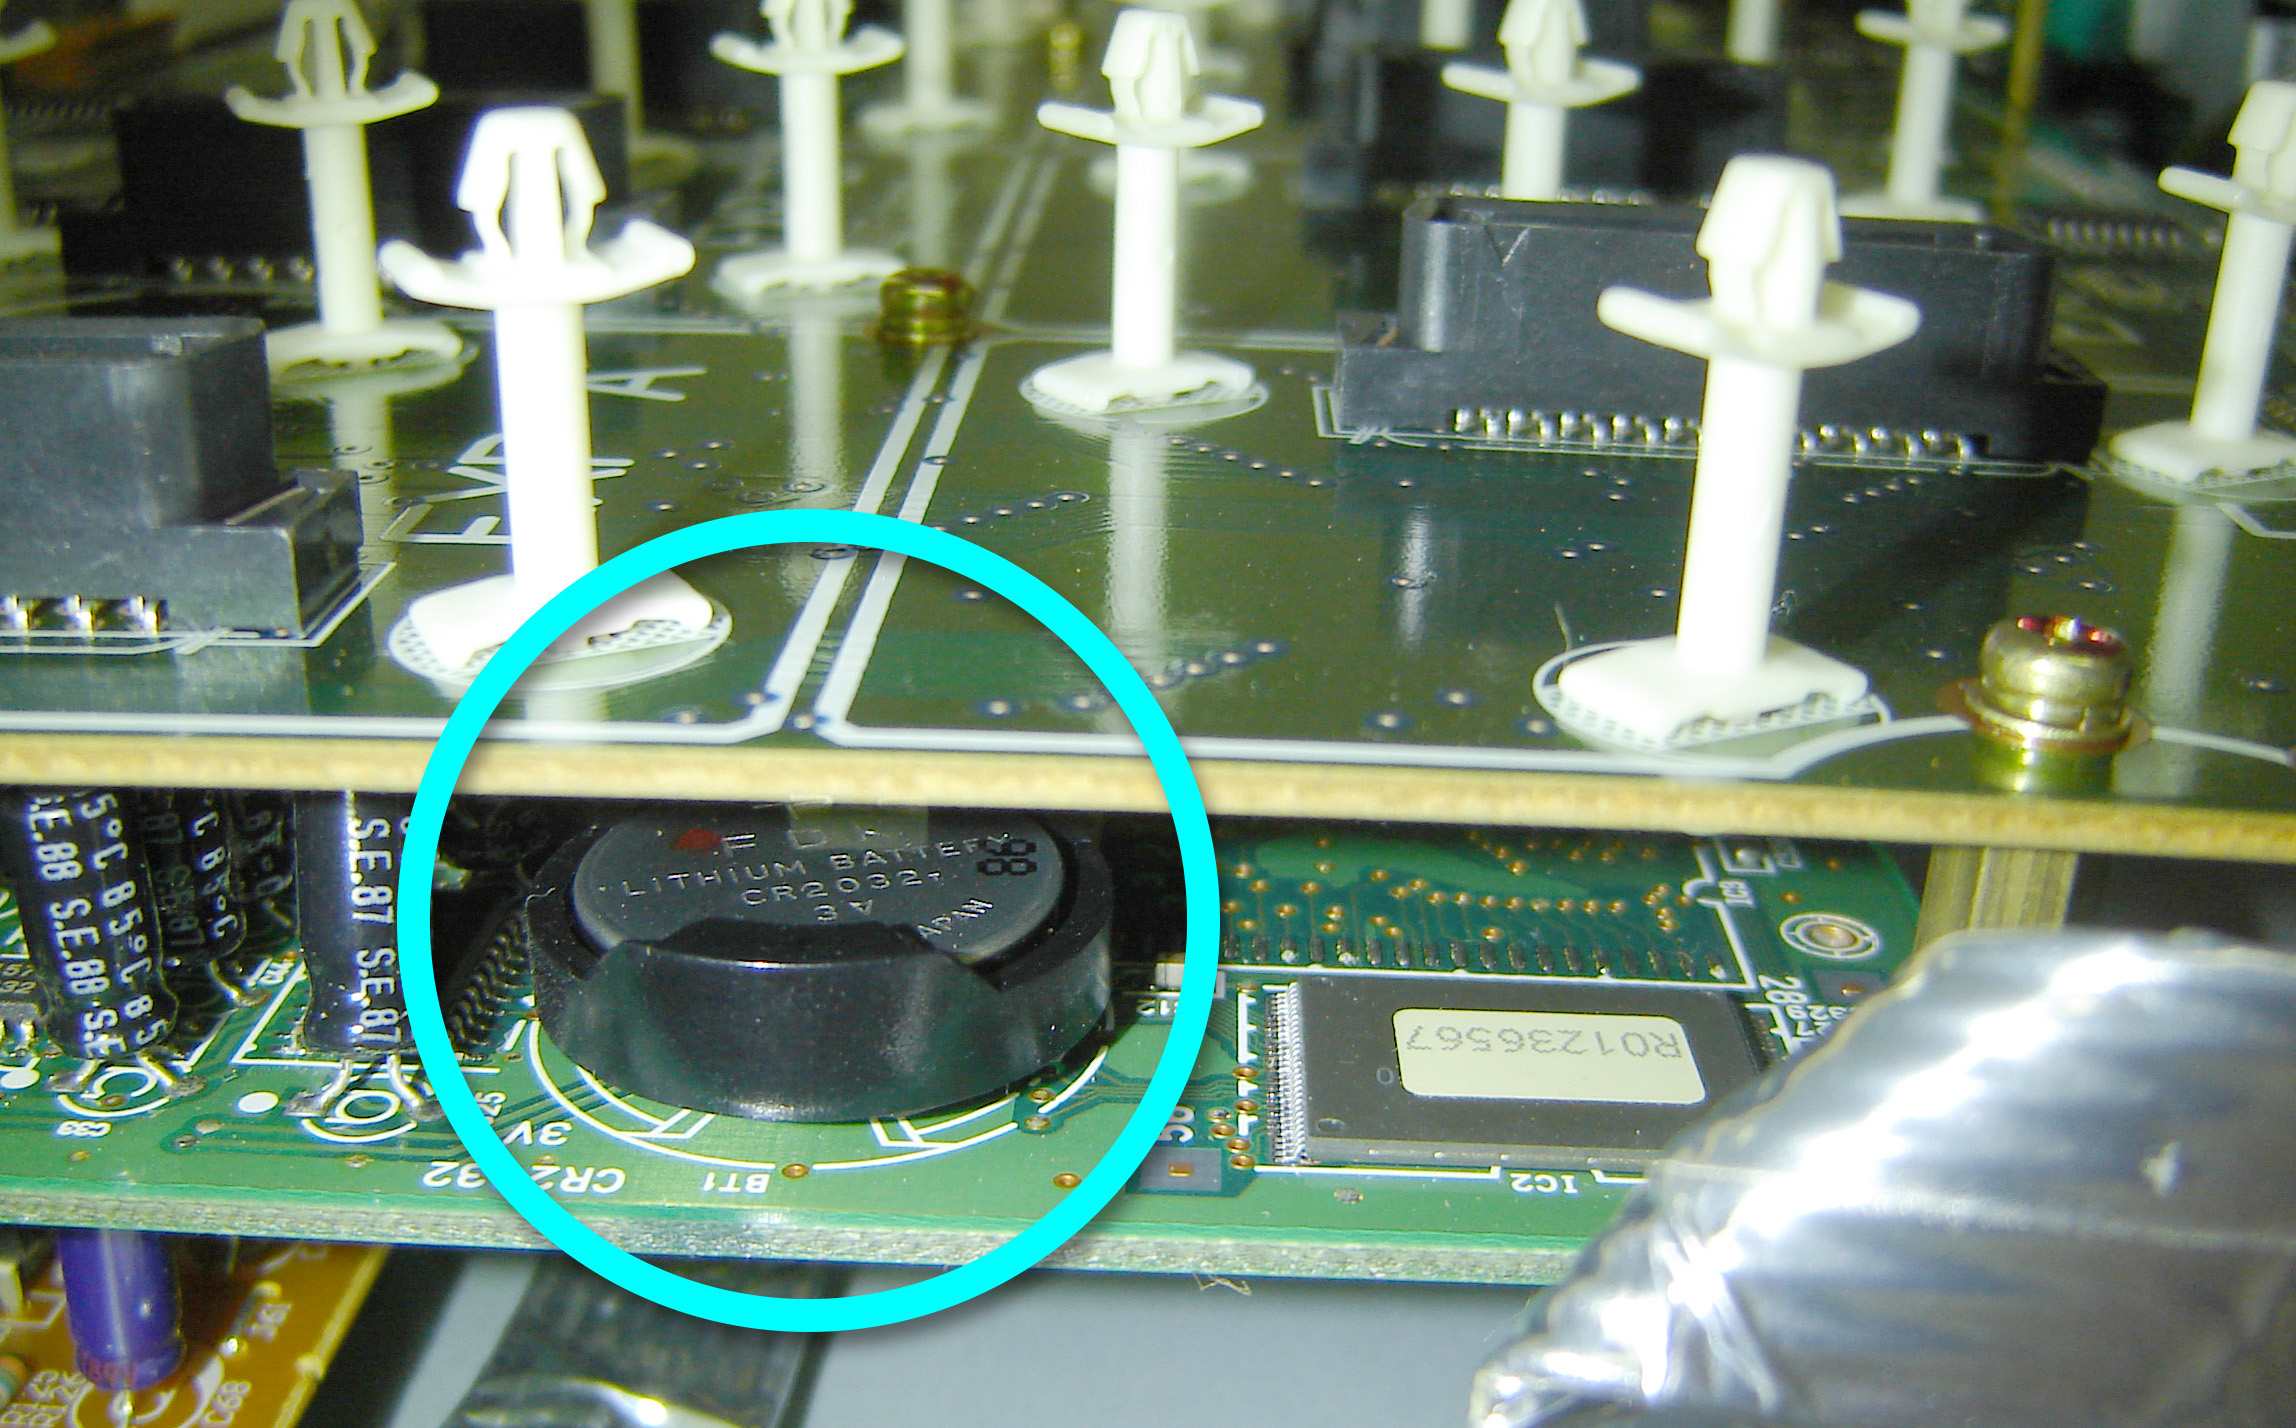
Step 3
Open the chassis and locate the battery on the left side of the mid-leveled board.
Step 4
If you want to be sure that nothing shortens the board or other components, place some Post-It notes around the battery holder to avoid the risk of damage. Use the cotton bud to press back the lock on the backside of the battery. On this part, you have to be a little bit careful.
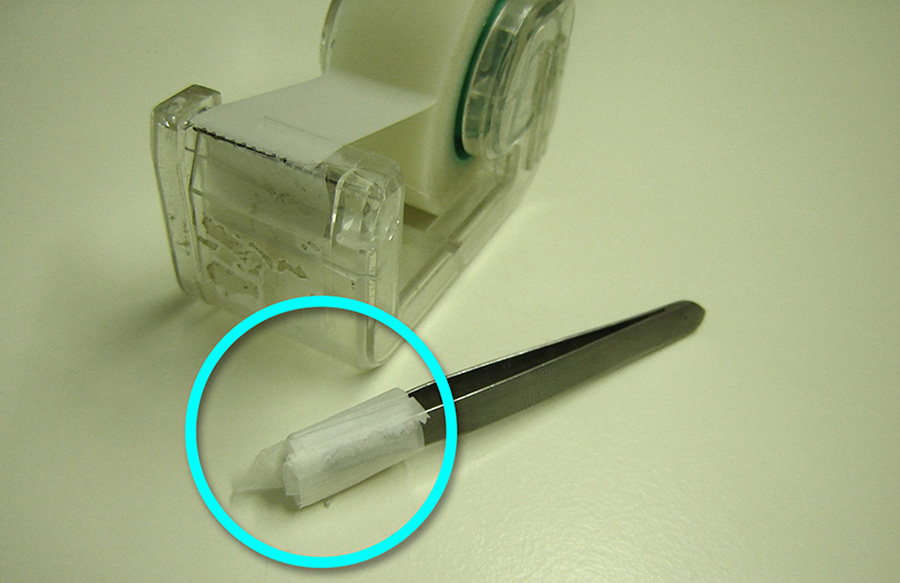
Step 5
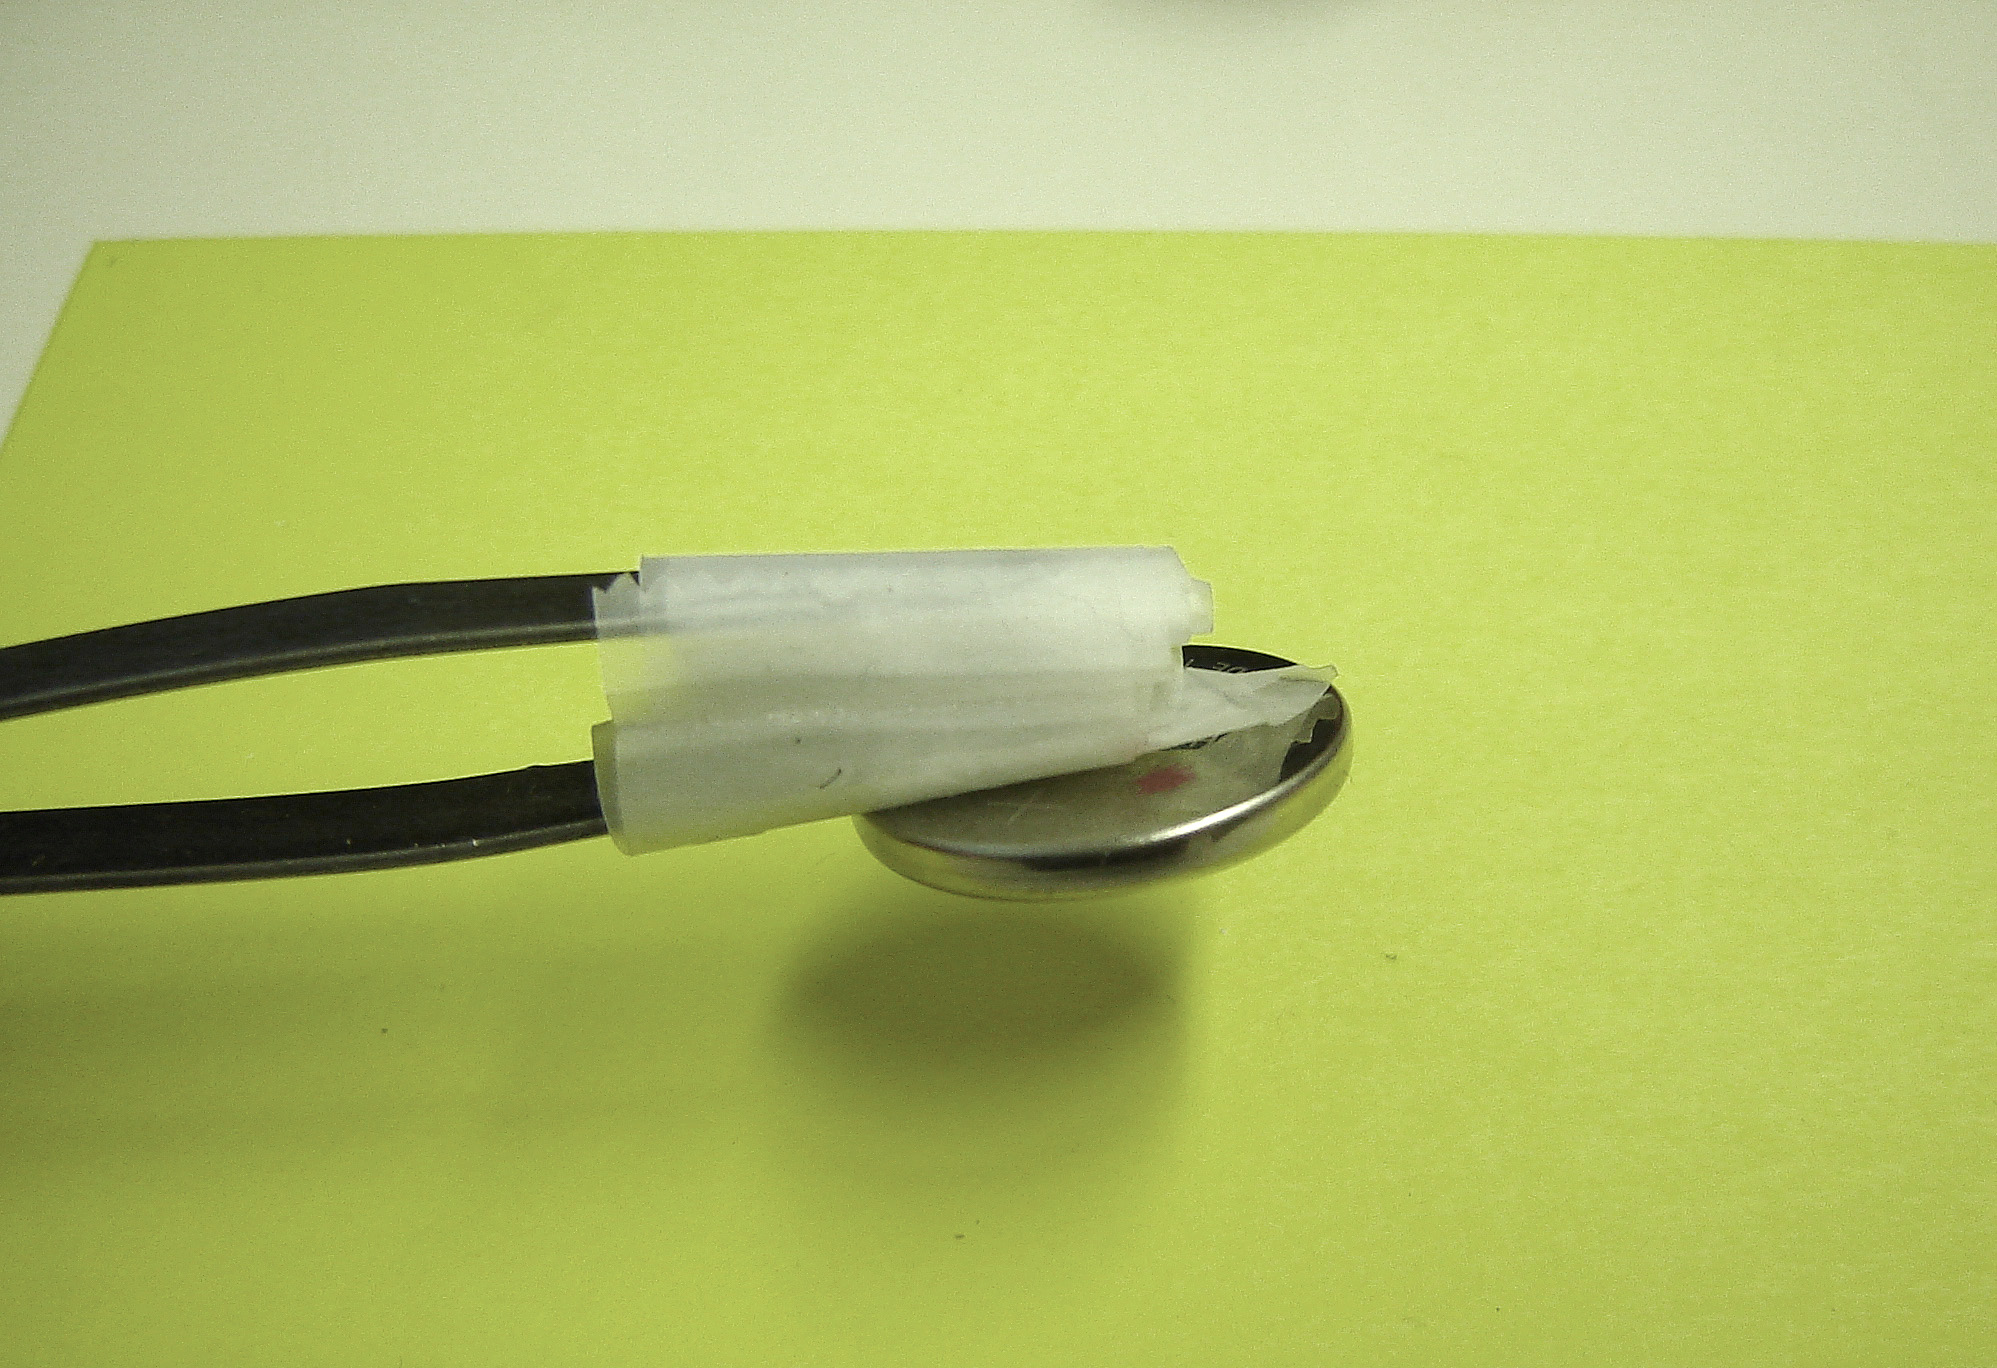
Take your Tweezer and fix some adhesive tape with the adhesive side of the tape outside, like shown in the photo below. This helps out a lot, as you dont have to touch the battery unnecessary. Use this "adhesive Tweezer" to remove the old battery from the board.
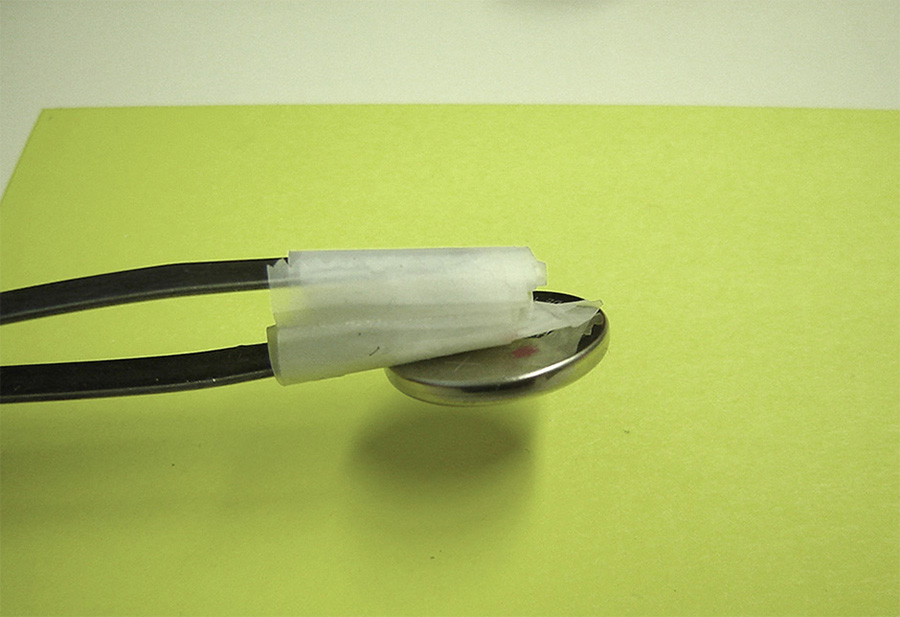
Step 6
Pick up the new battery the same way with your "adhesive Tweezer". Make sure that any kind of protective film is removed from the new battery before replacing. Place the new battery where you removed the old one. First, try to move the battery under the lock on the backside of the battery holder. When managed this, press down the frontside of the battery. Make sure the battery really is locked 100%. Again, you should keep in mind to act gentle on this part!
Step 7
After remounting the chassis again, connect your device and power up. The "battery low" message should not appear again. Go to your system settings, battery status now should be "OK". Restore your custom settings and user presets. If you have used a SysEx-Tool for backup, use it again to restore your data. Alternative, you can playback your user presets from the external storage cards, like M256-E or M512-E.
Additional Info
In some cases or on some units it can happen, that the display seems not to work after a battery replacement. No panic, the display is not damaged, just the contrast level has been set to zero, as the contrast level has been part of the custom settings. Just press the "System" button on the frontpanel which highlights the display automatically. After that, rotate the value dial to set the display contrast to a value which you prefer. If you feel not sure about the battery replacement procedure or if you have further questions about, feel free to contact us.
When you power up your JV-2080 and notice the message "battery low", the time has come to exchange the internal buffer battery. This internal battery keeps your custom settings and user presets stored when switching the device off. Exchanging the battery is not that complex as you might think.
First some informations which should be considered:
Safety advice
Make sure you have disconnected the device from voltage before opening the chassis and starting the replacement!
Please notice: You replace the battery on your own risk!
This tutorial shows the procedure of exchanging the internal battery. The author of this article (CYAN) is not responsible for any damage or data lost during the exchange procedure. Always be gentle and careful when acting inside an opened device!
Backup your customer settings and your user presets!
Your custom settings and user presets may be gone after replacing the battery. Make sure you backup all your data before starting. You can use an optional storage card, like the Roland M256-E or Roland M512-E. Otherwise, you can use any Sysex dump tool you prefer.
Battery type
The internal battery of the JV-2080 is a standard "CR 2032 lithium battery", running on 3V.
What tools are required for replacement?
⟩ A Phillips Screwdriver (to open the chassis)
⟩ A Tweezer
⟩ Adhesive tape
⟩ Post-It notes (optional)
⟩ A cotton bud
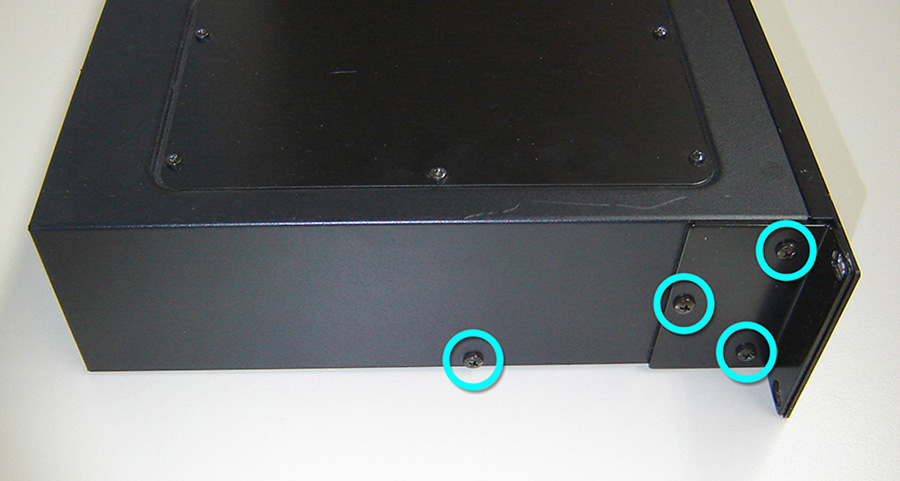
Step 1
Remove the screws on the left side and the right side of the chassis. The screws which need to be removed are marked here with cycles.
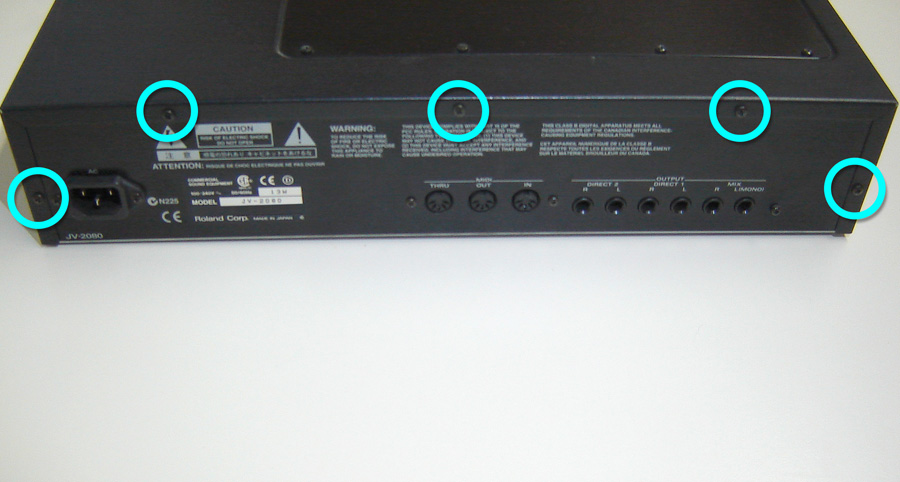
Step 2
Remove the screws on the backside of the chassis, as marked here with cycles.
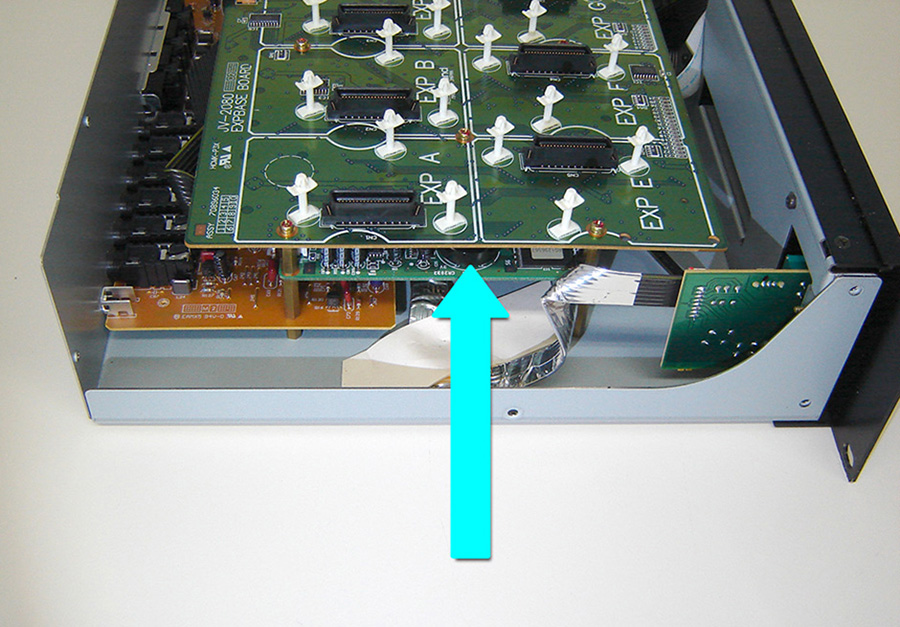
Step 3
Open the chassis and locate the battery on the left side of the mid-leveled board.

Step 4
If you want to be sure that nothing shortens the board or other components, place some Post-It notes around the battery holder to avoid the risk of damage. Use the cotton bud to press back the lock on the backside of the battery. On this part, you have to be a little bit careful.
Step 5
Take your Tweezer and fix some adhesive tape with the adhesive side of the tape outside, like shown in the photo below. This helps out a lot, as you dont have to touch the battery unnecessary. Use this "adhesive Tweezer" to remove the old battery from the board.

Step 6
Pick up the new battery the same way with your "adhesive Tweezer". Make sure that any kind of protective film is removed from the new battery before replacing. Place the new battery where you removed the old one. First, try to move the battery under the lock on the backside of the battery holder. When managed this, press down the frontside of the battery. Make sure the battery really is locked 100%. Again, you should keep in mind to act gentle on this part!
Step 7
After remounting the chassis again, connect your device and power up. The "battery low" message should not appear again. Go to your system settings, battery status now should be "OK". Restore your custom settings and user presets. If you have used a SysEx-Tool for backup, use it again to restore your data. Alternative, you can playback your user presets from the external storage cards, like M256-E or M512-E.
Additional Info
In some cases or on some units it can happen, that the display seems not to work after a battery replacement. No panic, the display is not damaged, just the contrast level has been set to zero, as the contrast level has been part of the custom settings. Just press the "System" button on the frontpanel which highlights the display automatically. After that, rotate the value dial to set the display contrast to a value which you prefer. If you feel not sure about the battery replacement procedure or if you have further questions about, feel free to contact us.